Tuesday, 14 January 2014

Foods That Cause Acne on face

1. Diet soda

Diet soda is very inflammatory to your body, since it contains the aspartame that increases the acne breakouts. Diet soda can lower the pH levels which can cause acne.

2. Sugar:

High sugar intake and a diet with a high glycemic index can placed high on the list of food that causes acne. Sugar in any form can cause spikes in certain pimple producing hormones. Foods such as chocolates and other sugary treats increase blood sugar, which may trigger acne. To get acne-free skin, you must avoid sugar as much as possible.

3. Dairy:

Cow’s milk contains many nutrients and growth hormones. These growth hormones can cause acne. Milk also increases the production of insulin in your body that can cause pimples on your skin.  Milk and cheese can increase the acne on your skin.

4. Gluten:

Gluten causes inflammation and digestion related problems that cause acne. Foods such as flour, cereal, bread, wheat, and pasta are the biggest causes of inflammation in your body that comes out as acne on the skin. Gluten has similar effects like sugar, so try to avoid these foods to get a clear skin.

5. Vegetable Oils:

Trans fats and highly processed vegetable oils are the major factors that cause skin breakouts. These include canola oil, corn oil, margarine, and other vegetable oils stimulate inflammation. Hence, it is advised to consume extra virgin olive oil or coconut oil for a clearer acne-free skin.

6. Salt:

Salt can lead to swelling in the tissues and give you puffy face. Iodized salt should be avoided in high doses, as they can cause acne. Check the sodium content of the pre-packaged foods before consuming. You should also rinse the meats, canned vegetables, and beans to reduce the sodium from them

7. Candy:

Candy is filled with sugar content that cause acne, wrinkles and unhealthy skin. They damage the collagen and elastin fibers, which is useful to maintain the firmness and youthful skin. This can also cause dry skin that produces premature wrinkles and skin sagging.

 8. Spicy food:

Consumption of excess spicy food can cause harm to your digestive system. This leads to inflammation sensation in your digestive track and acne on the skin. This also increases the blood circulation to the face that gives redness to your face. Hence, individual with acne must take spicy food in moderate quantity and take proper care for the skin condition. It is recommended to control or cure the acne in its early stage. They can be cured by clearing pores or medications advised by the doctors.

9. Caffeine for pimples:

Caffeine can be obtained from tea (black and green), chocolate, sodas, coffee, energy drinks and pain killers. Caffeine stimulates the adrenalin glands to release stress hormones that can increase the stress levels. Taking too much stress is harmful for your health and skin and lead to acne condition.
Caffeine can also disturb your sleep by not letting you go to the deepest phase of sleep. This sleep is essential for physical repair and detoxifying your body. These conditions can worsen the acne on skin.


10. Processed foods:

any processed or packed food is bad for your skin and health. Processed foods are highly refined that becomes difficult for proper digestion. This can cause many allergic reaction, inflammation and acne.
They are also filled with additives, flavors, and other chemicals that cause allergic reaction. Processed foods have high amount of fat and refined sugars that can cause diabetes, Excess belly fat and inflammation.
These foods aren’t necessarily bad for you, but when taken moderately you can avoid acne. If you suffer from acne, try and cut back on a couple of these and you may find yourself with healthy, beautiful skin. So there is your answer to what foods causes acne!

Monday, 13 January 2014

Essential Homemade Beauty Tips For Fair Skin

 Essential Homemade Beauty Tips For Fair Skin

1.8K Shares1.8K01
Who doesn’t crave for that perfect Barbie look – long hair, fair skin and a flawless glowing complexion? In this article, I am going to cover an exhaustive list of beauty tips for fair skin at home. But this isn’t all about just face packs. I have tried to cover foods and other basics that are often ignored.
Before we get to the fairness tips, you need to realize that protecting your skin from further damage is of the utmost importance. Otherwise, all our attempts will be of no use as our skin will keep sustaining damage and you will keep wondering why none of the treatments are showing any results! So how can we do this?

Simple Daily Skin Care Necessities:

Our skin needs time and care for it to regenerate and leave behind its old and tired self. Without this, improving our skin condition and colour is an absolute impossibility. This is why we need to ensure the below basics to make time for the skin to heal itself.
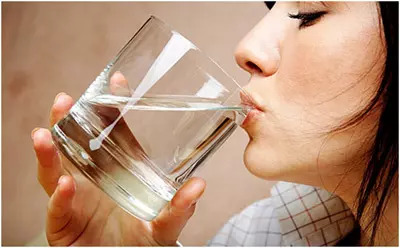
  • Drink a lot of water. Make it a habit to drink a minimum of 8 glasses of water every single day.
  • Sleep well. Do not stay awake till late at night.
  • Exercise for at least 30 minutes every day.
  • Follow a good skin care routine. Do not skip the exfoliation part on a regular basis as without this, we cannot get rid of dead and dry skin that accumulates and makes our complexion appear dull. You needn’t always buy a scrub. Homemade scrubs are just as effective! Use oatmeal as an exfoliator instead of a packaged product. There are many options!
  • Remove your makeup before you sleep every night. Yes, do this every night without fail no matter how dead tired you are! With makeup on, your skin cannot repair itself.
  • Incorporate Vitamin A and Vitamin C rich foods in your diet. This will bring a natural glow to your skin. Vitamin C tablets are available as well. You can have one every day after your lunch for a clearer skin tone.

Homemade Beauty Tips For Fair Skin:

So, now the question is how to become fair? Now that you have taken good care of your skin, it’s time to pamper yourself. Lather on these lovely face packs and relax as they work their magic. These are some of the oldest and most popular homemade beauty tips for the face that our grandmas have passed on to us!

1. Tea water and honey face pack:

Things you will need:
  • 1 cup of tea water (cooled down)
  • 2 spoons of rice flour
  • ½ a spoon of honey
The rice flour acts as a very good scrub and honey moisturizes the skin. 
Method:
  • Mix the above ingredients and apply on the skin. Leave it on till the mask dries completely for around 20 minutes or more.
  • Before cleaning the mask with water, make sure you massage the facial skin in circular motions; this is very important as it removes the dead skin and evens out the skin tone.
  • Then wash your face with cold water .This gives you a fairer and even skin tone. 

2. Oats and lemon face pack:

Things you will need:
  • 1 tbsp of oats; cooked and mashed (helps reduce inflammation and heals the skin)
  • 1 tbsp of lemon juice (lemon helps lighten the skin tone)
  • If you have sensitive skin, you can dilute the lemon juice with water.
Method:
  • Mix the above ingredients and apply on the face by massaging into the skin.
  • Let it dry for 20 minutes
  • Wash it and pat dry.
Look into more of these oatmeal face packs for a fairer face and glowing skin

3. Turmeric and lemon face pack:

Things you will need
  • Gram flour
  • Turmeric
  • Lemon juice
  • Milk 
Method:
  • Mix all the above ingredients and apply evenly on the face.
  • Scrub the paste gently on your face for 5 minutes and let it dry for 20 minutes.
  • Once it’s dry, clean your face.

4. Turmeric and tomato face pack:

Things you will need:
  • Turmeric
  • Tomato juice
Method:
  • Mix turmeric with tomato juice
  • Apply on your face and allow it to dry
  • Wash your face with tepid water.
This is quite a popular pack among women for its simplicity and the results it produces!
  • Alternatively, try this even simpler remedy. You can take out the tomato pulp and massage your skin with it. Leave this on for 15-20 minutes and rinse off. This will help to bring about a change in your complexion if done every day.

5. Turmeric face pack:

This is an all-time favourite! The results have always been so stunning that this has now become a must-do ritual for a bride before the wedding day!
Things you will need:
  • Gram flour (Good exfoliator)
  • Pinch of turmeric (lightens skin tone)
  • Milk (moisturizer) 
Method:
  • Mix all the above and apply the mask
  • Scrub the paste gently on your face for 5 minutes and let it dry for 20 minutes.
  • Once it’s dry, clean your face.

6. Yogurt and dried orange peel:

Things you will need:
  • Dried orange peel
  • Fresh and unflavored yogurt
Do not throw away those orange peels after eating the fruit! Dry the orange peels first under the sun.
Method:
  • Grind the dried orange peels to powder.
  • Mix 1 tbsp of it with 1 tbsp fresh and unflavored yogurt to make a paste.
  • Apply and keep on cleansed skin for 15-20 minutes
  • Then rinse off.

7. Yogurt and lemon:

Things you will need:
  • Fresh and unflavored yogurt
  • Fresh lemon juice
  • Mix 1 teaspoon of lemon juice with 1 tablespoon of fresh and unflavored yogurt and mix well.
    • Apply and keep on cleansed skin for 15-20 minutes
    • Then rinse off.
Method:
This will not only make your skin fairer but it will also reduce the acne marks and dark spots (if any) on your skin.

8. Milk, lemon juice and honey:

Things you will need:
  • Milk
  • Lemon Juice
  • Honey
Method: 
  • Use 1 tsp each of milk/milk powder, honey and lemon juice, and mix together well.
  • It should be applied on cleansed skin and left for 15-20 minutes
  • After that you can rinse it off.

9.  Milk and saffron:

Things you will need:
  • Cold unboiled milk (raw) – 2-3 teaspoons
  • A few strands of saffron (also known as kesar)
Method:
  • Put 5-6 strands of saffron in the milk in a bowl
  • Let it stay for 3-4 hours
  • Cleanse your face and neck, and apply this
  • Leave it on for 15-20 minutes
  • Wash off with lukewarm water
This is one of the most effective means for achieving fairness. It also makes your skin soft and smooth. Raw milk is not very heavy; hence, this will suit all skin types.

10. Papaya and fuller’s earth:

Things you will need:
  • 1 tbsp papaya pulp
  • 1 teaspoon fuller’s earth (multani mitti)
    • Mix the two together
    • Apply on cleansed skin
    • Let it dry and rinse off
Method:
This makes for a refreshing summer mask as well.

11. Potato

Things you will need:
  • Potato slices, in pulp or juice form.
Method:
  • Use potato slices or the paste of potato as a mask or you can even apply the juice on tanned portions of the skin.
  • This can be applied twice daily on your skin.
  • After 15-20 minutes, wash off with plain water.

12. Lemon or orange rind:

Things you will need:
  • Lemon or orange rind
  • Raw milk
Method:
  • Take lemon zest or lemon rind (the outer skin grated), or even orange zest; dry them out in the sun (do not microwave) and then grind them to powder.
  • Store in a dry air tight container
  • Mix it with raw milk and use as a pack on the affected areas.
  • Wash off with warm water only.
  • Immediately use a cooling toner.
Here are some more Ayurvedic face packs for fair skin.

13. Healthy diet:

With daily care and treatments nailed, what we need to monitor next are our eating habits. For without the right nutrients, our skin cannot undo the damage that it sustains on a daily basis!
Here we tell you what you should eat. In other words, a healthy diet for your skin is necessary!
The right quantities of all the ingredients need to be consumed for the skin to portray health and for the fairness to reflect.
  • Eat fruits with Vitamin C for the antioxidants they contain.
  • Balance your diet to get the right amount of proteins and unsaturated fats along with fresh, green vegetables to provide the right portions of nutrients for your skin to naturally care for itself.
  • We have some excellent resources to help you with your diet:
  • Best Fruits for Glowing Skin
  • Best Foods for Glowing Skin

14. Sun protection and care:

With all this attended to; there is still one thing you need to keep firmly in mind! Do not step out into the sun without protection! Are you wondering why? How can forgetting one lotion cause so much damage? Don’t ever question the effects of the harsh sun rays and the UV radiation that your skin is exposed to when you step out of your home! That is why you need to use a sunscreen!
  • Always apply a sunscreen before stepping out into the sun.
  • An SPF of at least 30 or more depending on your skin type is necessary.
  • UV rays darken and damage your skin! So, make sure you reapply your sunscreen every four or five hours.
These are of course not fail-proof! But if you have already spent too much time in the sun, you first need to lose the tan and burns. Try these out to address the issues.

15. Homemade tan removal:

Tans are inevitable! No matter how much sunscreen we lather on, the brutal sun these days finds a way to harm us! There are several ways to remove tan right at your home. Here is an excellent article to remove tan at home.
But here we shall enlighten you on one of the most famous tan removal packs ever!
Ubtan
This traditional country treatment includes the use of a mixture of besan, turmeric and yogurt. Turmeric removes the blemishes and dark spots. Yogurt clears the excessive tan. And, besan handles the cleansing of your skin. It suits all skin types and can be done every day as it is very gentle. The effects are visible quite immediately but removal of tanning needs a couple of days or weeks, depending on the intensity of the tan.

16. Homemade sun burn cure:

Well, sun burns are but natural once you hit a beach for your vacation, but that doesn’t mean you need to go back to work looking toasted.

Best Wedding Day Makeup Tips Based On The Wedding Time

Most women get fret about their looks, hair and makeup for their wedding day continuously. If it is makeup you are concerned about, then we have some cool wedding day makeup tips that will make you look glowing and beautiful throughout the big day.
morning weddingsTo have a fun filled and perfect wedding, get enough sleep the previous night. Consume good amount of water and pamper your skin well so that it remains flawless on your Wedding day.

Wedding Day Makeup tips for Brides

Remember, make up for morning, mid-day, afternoon and night weddings would be different.
Morning Wedding Tips:
Keep the makeup subtle by using natural colors. Below are some tips for the daytime bride. Just see, they work wonderfully!
  • In hot weather conditions, use a primer so that the makeup will not melt.
  • Choose a foundation with medium coverage and matte consistency.
  • Choose subtle warm colors to keep the eyes simple.
  • Use a subtle matte shade blush.
  • Line your eyes with a thin coat of eyeliner.
  • Apply a coat of mascara.
  • Choose a natural shade of lipstick, stick to nude shades like light pink; avoid red, maroon or deep colors.

Mid Day Wedding Tips:

If it is an outdoor wedding, the sunlight is harsh. And this is not at all a difficulty when you go for proper makeup. There are some simple tips to look best during the wedding.
  • Use a primer and choose a light matte foundation.
  • Do not use lots of shimmer or glitter.
  • Use matte blush.
  • Choose a light shade of eye shadow, a shimmery highlighter and keep the mid-tone and contour shade matte.
  • Use false eyelashes and eye liner sparingly.
  • A neutral shade lipstick is perfect for the occasion.

Afternoon Wedding Tips:

Afternoon weddings have the best light for photography so you need to choose a more dramatic look than the mid-day brides. Use colors to add that drama in your looks.
  • Prime your face and eyelids
  • Use a medium coverage foundation and keep it matte with pressed powder.
  • Use richer colors for eyes; opt for a nice eyeliner and false lushes
  • Add drama to your lips with some deep color

afternoon weddingsEvening Wedding Tips:

An evening bride can go dramatic, as this is the perfect time to be dressy and colourful.
  • Prime your face and eye lids, use a concealer if necessary.
  • Use a full coverage foundation for long lasting makeup
  • Opt for colors like dark pink, maroon, red, pink or golden for eyes, blend well and create a smoky eye look for more drama.
  • Bronzer to highlight the contours of your face
  • Use a good blush to define your cheeks
  • Define the brows, go for a thick line of eyeliner and complete the look with false eyelashes.
  • Use a dark lip color to highlight your lips.
Your wedding is a big day that is the time to be in special attention. Therefore you should not let your makeup deluge your natural shine. Hope your will surely follow the above Wedding day makeup tips to add a bit of shine and oomph for your wedding. Go for a natural glamarous leer!
pics:

7 Tips To Look Best On Your Wedding Day


bridal makeup tipsThe aim of your wedding makeup is to look your natural best! The best would be that, when you run to your albums after a couple of years, you would still look mesmerizing.
Highlight your best features and hide the flaws. Plus make sure to make your makeup last the whole day, even after all hugging, crying and eating. Everything must look fresh and not caked up, even at the end of the day. Hence you need to get the best of products and the proper shades to get that perfect look.
Here is a guide on Indian Bridal Makeup looks and the ways on how you can achieve this. Make sure you follow these basic steps for best results.
Wedding Day Makeup Tips For Brides

1. Moderation is the key:

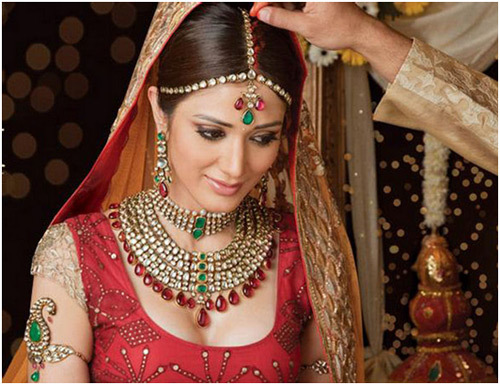
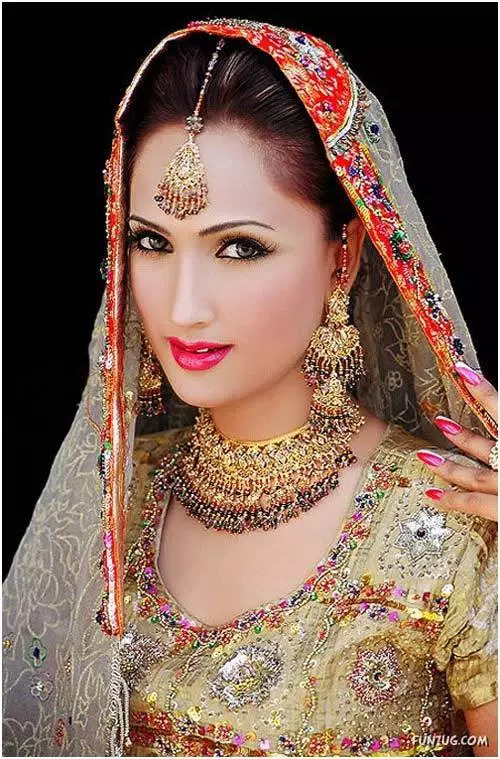
wedding makeup tipsThe main idea of perfect bridal makeup look is to accentuate the best features at the same time keep the overall look simple yet gorgeous. As it is, Indian Brides are loaded with jewelry and heavy dresses, hence it is best to keep the makeup neutral.

2. Explain your needs to the makeup artist:

makeup tips for wedding party Benefits of Multani mitti

If you are hiring a makeup artist, make sure you explain what you need clearly! Explaining things in advance will help you get the look you want. Come on, a bride has the right to make all the demands! If the makeup artist is new then, it is always recommended to get a trial session before your wedding day.

3. A trial photo session with the makeup:

makeup tips for wedding dayA trial photo session with the final makeup is always recommended. The reason is, some foundations and powders tend to look brighter or lighter in pictures as they reflect light in a different way. Hence taking pictures with flash prior to the wedding can give you an exact idea of how the final bridal makeup looks on camera. It is better to be prepared in advance, over the last minute bad picture jitters.

4. Select the perfect shade of foundation: 

foundation for wedding makeupMost brides in India tend to go wrong with the foundations. Hence, make sure to blend the foundation on your neck region to check, and also check whether it matches your skin perfectly or not. Always remember to apply foundation on your neck too or else your face will look different from the rest of your body.

5. Get skin treatments done in advance:

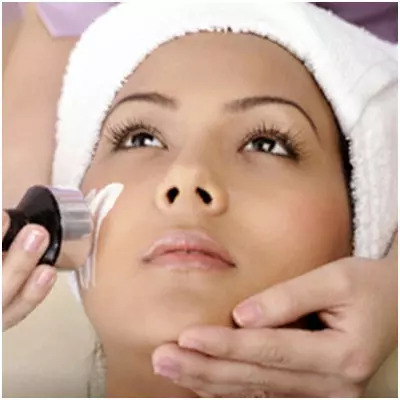
skin care tips for bridal makeupBrides must always get their beauty treatments, such as facials and waxing done well in advance before the wedding day. At times these treatments irritate your skin and leads to outbreaks and makeup can very well aggravate these issues.
And I am sure; no one would like to get such unwanted visitors to ruin their special day. The same thing holds true for eyebrows as well. Get them plucked and shaped one or two days before your D Day. If you wait to pluck them on the same day, they may look red and swollen, and also could give you rashes, making you feel itchy, before make up application. This might totally spoil all your overall effort to look good.

6. Wear Contact lenses before makeup:

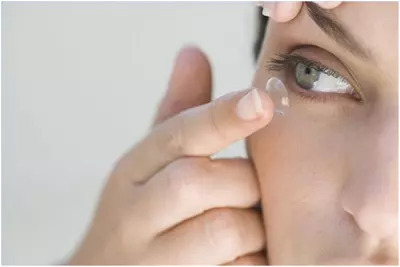
contact lenses make upIf you are a person who wears contacts, make sure to wear them before makeup application. Because there are favorable chances of your eyes watering. This can possibly ruin the effort you took to apply the right makeup.

7. Ward of stress Hormones:

water benefits for skinLast but not the least you need to relax and shun off all the stress. I know it’s difficult to practice but stress can spoil your skin making it look worse.
I remember getting boils on my face before my wedding and engagement. So I am sharing my personal experience with you all. Relax as much as you can and drink plenty of water and eat lots and lots of fresh fruits and vegetables toget glowing and beautiful skin for your “Big Day”.
Hope these tips for a bride on her wedding help! Do leave us a comment!

Sunday, 12 January 2014

learn Muslim Bridal Makeup step by step

Muslim Bridal Makeup – Step Wise Tutorial With Images

Unquestionably a girl would like to look her best on the D-day. Unfortunately with the new breed of inexperienced and low grade makeup artists cropping up in the local saloons, the probability of a bride not getting the right look is very high. Imagine if you could do your own makeup. Would that not be great? Surely, nobody knows what suits your skin the best or what look you would be the most comfortable with, better than you do!
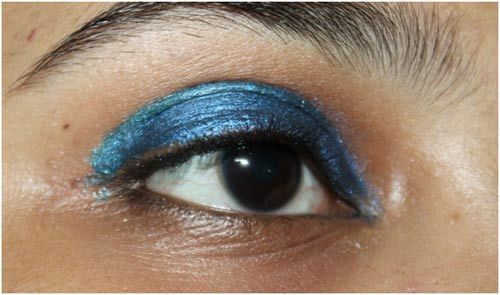
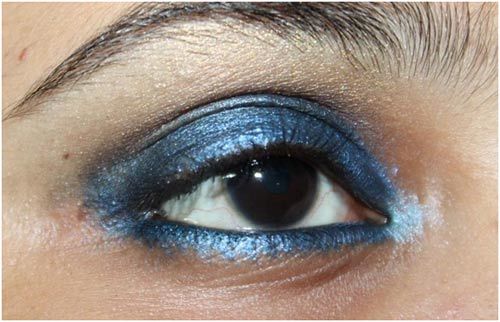
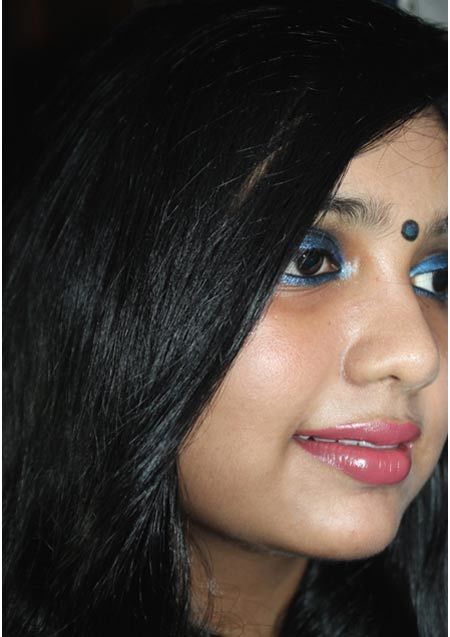
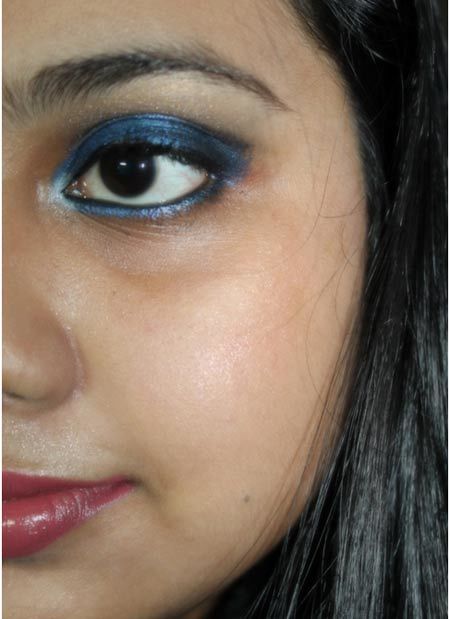
An Islamic wedding is rather less hectic when compared to a traditional Hindu wedding as there are only a few rituals and the bride has the freedom to dress up the way she likes. Muslim Bridal Makeup:This particular look has been designed for the eyes to be the central attraction so the makeup highlights the eyes with a bright shade of blue.

Step 1:

Clean your face with a good cleanser. Use a heavy duty makeup remover to remove any traces of existing makeup and then follow it up with a toner and a moisturizer. Use products which you would normally use and do not experiment with new products on this day.

Step 2:

Conceal any spots, blemishes or dark circles that you might have with a concealer. If you want the makeup to last really long, use a face primer before applying your foundation.

Step 3:

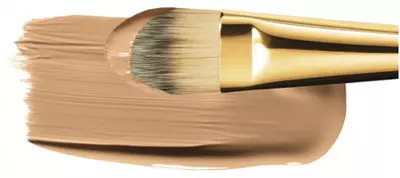
Apply a good foundation. The one used in this look is ‘Lotus Purestay Foundation’. It has been applied with a foundation brush. You can use your hand or a makeup sponge instead. Blend in completely and look out for streaks and uneven application. The foundation should be light and preferably without SPF as it tends to oxidize less and does not make you look white with flash photography. Do not forget to apply some on the neck too as it looks quite unpleasant if you have different coloured face and neck.

Step 4:

Apply a primer on the eyelids or use a good concealer to create a smooth base for the eye makeup. Pat a bit of translucent or compact on the eyes before beginning the makeup.

Step 5:

blue eye pencil makeup
For this particular look, a bright blue eye pencil has been used on the eyelids as a base. You may apply the eye shadow directly but having a creamy base makes it stay much longer. After the pencil apply the eye shadow on the inner two thirds of the eye lid. While applying always use a good quality brush/applicator and tap off the excess so that there is minimum fallout.

Step 6:

black eyeshadow makeup
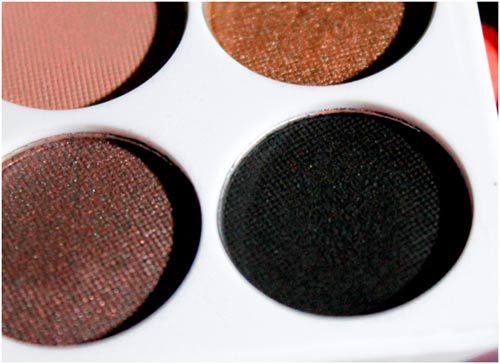
Take a black eye shadow and apply it over the outer part of the eyes. You can choose between glittery black or matte black. The one used for this look is matte black.You may also use a kajal pencil to create smokey eyes.

Step 7:

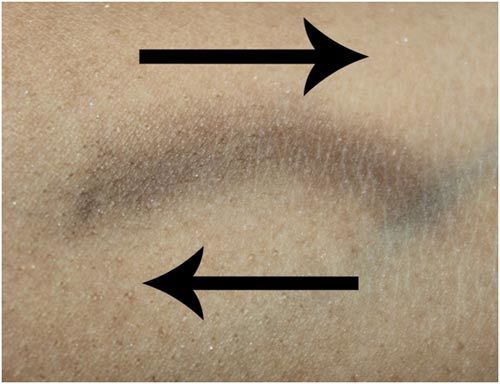
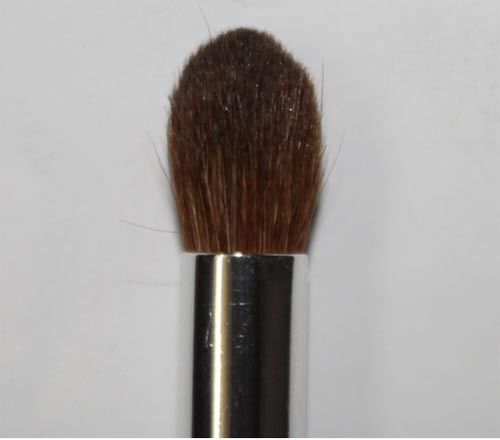
Take a fluffy blending brush and use a sweeping motion from the black eye shadow onto the blue one. This will blend the two shadows together and create a smokey effect. If you feel the shadow has become less intense, add a bit more and blend again.
fluffy blending brush
Take a bit of the black eye shadow onto a small brush and apply it on the crease and blend it in towards the inner corner. Blend again using the fluffy brush to remove any harsh lines.

Step 8:

Line the lower lash line with the blue eye shadow. Now line the eyes with a black liner just to define the shape. Make it as thin as possible. You can also use a thin line of kohl on the lower lash line.
lower lash line eyeliner
highlighter shade
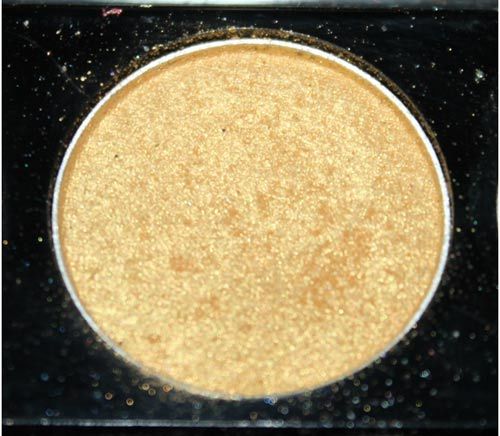
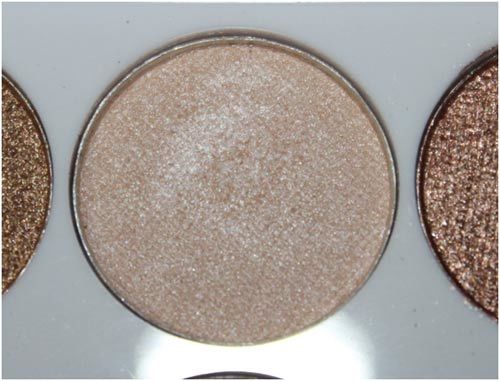
Apply a highlighter shade just under the brow bone and a bit on the inner corner of the eyes. Here a pale golden eye shadow has been used on the brow bone and a white highlighting shade for the inner corner.
blue shades

Step 9:

Finish off with loads of Mascara. You may also curl your lashes.

Step 10:

eye makeup ideas
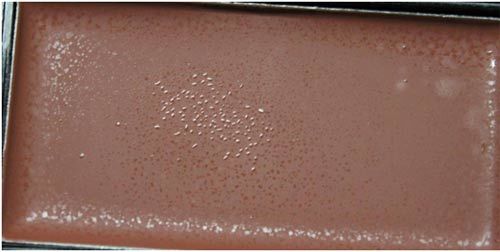
Clean the fall outs from the eye makeup and prepare for blush. Cream blushes give a dewy finish when compared to the powder ones. Take a bit of the blush on the tip of your fingers or on your brush. Start from the apples of your cheek and work towards the temple. Keep a light hand and build up the colour as per your requirement.

Step 11:

Sweep a layer of loose powder or translucent powder on top. Use a fluffy face brush and tap off any excess while applying to avoid a cakey look.

Step 12:

Line your lips and apply a natural pink colour. Lotus Pink Blush has been used for this look as it is a very natural shade and balances the eyes perfectly. You may use any other natural, nude or neutral shade. Top it with some gloss and you are ready to go.
make lips natural pink
eye colour spell
The eye colour can be changed to any colour of your choice- blue, pink, maroon or even red. Just be mindful to check the lip shade accordingly as with a pink makeup it would be better to use nude or coral lips.
So the next time you want to put on some crazy muslim bride makeup and paint the town red, do not hesitate to pick up your brushes/liners and boldly experiment with colours and strokes. Follow the above mentioned guidelines and you would realize that looking like a million bucks does come easy after all!

Useful Bridal Tips For Pakistani Indian Skin Tones

Useful Bridal Tips

A wedding is that event in a girl’s life that she has been dreaming of ever since she was a little girl. The day of the wedding is undoubtedly one of the most important days in a girl’s life, as she is the only point of attention. Most girls start planning their wedding way in advance – from the venue to the floral decorations to the wedding dress et al.
The makeup that the bride wears is one that will forever be etched in photographs and videos. So, it’s very important for the makeup to be right.
Indian skin tones vary from person to person to an enormous extent. However, they can broadly be categorized into three groups – very fair to fair, medium and dark.
While going for your bridal makeup, it’s very important that you keep your skin tone in mind.
Here are some Indian bridal makeup tips for dark skin, fair skin and medium skin Indian brides:

Indian Bridal Makeup Tips for Very Fair To Fair Skin Tones:

Since you have the palest of all skin tones, all cool tones in the makeup world are meant for you. You can easily carry off bright pinks, bright reds and other such hues. Choose a proper foundation as there is always a fear of looking ghostly pale if the foundation doesn’t match. If you want to be a unique bride, go for bright colours for your lips – pinks and pink based peaches. MAC and Inglot have many such lovely colours. You can also experiment with varied hues for your eye makeup. Make sure that your eye makeup and lip makeup do not cancel but instead balance out each other. For the blush, try beautiful shades of coral and pink.

Indian Bridal Makeup Tips for Medium Skin Tones:

Blessed with the wheatish-to-medium skin tone, you have an array of makeup products to try out and have fun with. Most of the warm-toned cosmetics and some cool-toned ones are perfect for you. Let your foundation be the perfect match as it serves as the canvas for all the makeup. For your lips, you can try red and red-based berry shades as these will give you a typical Indian bride look. If you would prefer pinks, stay away from lighter shades as they might wash you out. Pink coloured lipsticks that veer more towards peach or red will definitely look good on you. Your eye makeup can also be experimented with. If you are going for a heavy eye makeup, keep the lips simple. If your lipstick is bold and beautiful, keep the eyes simple. This will make sure that you’ll look balanced and every inch of the diva that you are!

Indian Bridal Makeup Tips for Dark Skin

Olive skinned beauties can rock the warm-toned lipsticks. The berry shades, pink based purples, dark reds and maroons are yours to have fun with! Finding a matching foundation is very important. Try avoiding foundations that make you look lighter or darker; the one that looks like second skin is your foundation shade. Stick with colors that are muted to avoid looking over the top. Colours for your eye makeup and lip makeup should complement each other. The earthy-toned blushes are your best friends. MAC has some fabulous blushes for dark skinned lovelies!

A few tips to remember before D-day:
  • Get your makeup trials done beforehand
  • Try using oil-free products as much as possible
  • Insist on using a primer
  • You require different concealers for different areas of your face. Talk to your MUA.
  • To make blush stay longer, apply powder blush on cream blush – make sure they are of the same colour family and blend well for a customized colour
  • Using shimmer powder on the inside corner of your eyes will make them look beautiful and make your eyes pop

So girls, keep these in mind and look fabulous on your wedding day! These tips on bridal makeup for Indian skin help you! Be yourself and be gorgeous!

Benefits Of Multani Mitti For Face, Hair,Skin And Health

Multani Mitti

     Multani mitti, is hugely popular for its healing property against acne and blemishes.  It is very rich in magnesium chloride which helps to reduce acne. Originally used as an absorbent in the wool industry this ingredient is now greatly used in many skin care products. You can use it as a cleanser, toner and most importantly as multani mitti facial packs, which are very popular. It’s very pocket friendly and has no side effects either. Go natural this time to have a glowing skin. It is sweat resistant and can also be used to improve your hair condition. But for today I will concentrate on benefits of multani mitti on face, skin and health. have a look.

1. The reason that multani mitti is so raved about because it removes the dead cells from the skin making space for it to breathe.
2. Multani mitti masks are very effective in making your skin glow as well as improving the texture of the skin. It also makes it radiant by removing acne and blemishes to a great degree. It is well capable of removing all the impurities from your skin so that your pores are not clogged anymore and thus prepares your face for serum or cream application. In this way the cream gets more absorbed and works more effectively.
3. One of the most popular uses of multani Mitti is for those with oily skin. Multani mitti with rose water makes an excellent  face masks for oily skin. For dry skin, add milk and almond paste with it. It improves blood circulation also!!
4. Multani mitti is well known for its oil absorbing property. It’s for this reason that it is added in the face packs so widely. It cools down aggravated and irritated skin instantly. It works wonders for acne prone skin. It soothes it and also reduces the redness and the flaming irritation. It not only reduces the acne but also reduces the appearance of them again. To reduce blemishes use a pack of multani mitti with tomato juice, turmeric and sandalwood powder. Apply and leave for ten minutes and then rinse it off. It also acts as a wonderful cleanser which brightens the face immediatety!! However you should always remember that it’s not a magic potion so it will not reduce the blemishes overnight. So you have to follow the mask for a time and be patient to have the glowing and blemish free skin.
5. If you have pimple and those pimple marks are bothering you like hell, then this versatile multani mitti is again at your service!! Add neem paste, ground clove powder and camphor with multani mitti. Add rose water to make a smooth paste and use it weekly to reduce those ugly marks off your skin.
6. Multani mitti also reduces sun tan and helps to reduce pigmentation. It can also heal your scar marks. Add some essential oil with multani mitti for your face pack and it will give soft supple skin in no time.
7. As a scrub, multani mitti removes black heads and white heads completely!! Add multani mitti with grinded almonds and glycerine soap and use this mixture to scrub your face.
8. Multani mitti is truly a great skin care ingredient as it helps you tone the skin too. Add one beaten egg and one spoon of curd to one spoon of multani mitti. Mix it well and apply it on the face for 20 minutes to achieve a toned skin.
9. You can reduce scar marks by applying the paste of one spoon of carrot pulp mixed with some multani mitti and 2 spoons of olive oil.
10. Multani mitti can reduce your pimples too. All you need to do is to grind some neem leaves and mix it with multani mitti to form a fine paste. Apply it for 10-15 minutes and then wash it with cold water.
However you should always remember that multani mitti is highly beneficial for oily skin. If you have very dry or sensitive skin, stay away from it as it can aggravate the situation.
[ Read: Multani Mitti ]

Multani Mitti for Skin and Health:

11. As a body wash: A cooling and healing body wash
  • 1 cup oatmeal powder
  • 1 cup neem powder
  • 1/4 cup white chandan powder
  • 1 spoon of amba haldi powder
  • Kala chana powder
  • Multani Mitti (fuller’s earth)
  • Milk
Mix all of these and store in a bottle to make a good body wash for everyday use.
12. As an antiseptic:
Multani Mitti is an antiseptic agent. Multani mitti for face benefits also to heal skin irritations and offers soothing effect on the skin.

13-The use of multani mitti for face is an age old tradition. It contains healthy nutrients and gives natural oils to the skin. Mix it with any other mask and you are set to glow. It helps your skin in many ways like diminishing pore sizes, removing blackheads and whiteheads, fading freckles, soothing sunburns, cleansing skin, improving complexion, reducing acne and blemishes and making your skin glow.
Mix multani mitti with besan and turmeric for fair and healthy skin. Cleanse your skin thoroughly, apply a thin layer of this paste on your body, face, throat, and chest, and leave on for 20 minutes. Rinse with lukewarm water. You can use this treatment every day instead of soap.
14. Blood circulation:
Using multani mitti paste on any part of the body helps in improving proper blood circulation. This makes Multani mitti for glowing skin an ideal solution.
15. Warn and cold compressors:
You can either use it as a warm or cold compress to treat problems of menstrual cramps, muscle pain, sunburn, insect bites and burns.
For a warm compress, mix it with lukewarm water and apply.
For a cold compress, mix it with cold water and apply.
16. Heat relief:
Mix to form paste of fuller’s earth made with water. Apply on the whole body to soothe the effects of hot temperature and sunburns. Avoid using on chest areas as its high cooling property can create respiratory problems.
17. Laundry:
Surprising, but yes! It is a superior cleaning agent that helps in absorbing and discolouring stains of greases, oils, waxes and blood on skin or clothes. This is always found in laundry detergents for washing greasy clothi]
Some important tips for Multani Mitti:
1. Opt for genuine quality multani mitti.
2. Eating it can cause kidney stones or clog intestines.
3. Store Multani Mitti in a cool and dry place and always away from heat, air and sunlight.
4. Store it in a refrigerator or outside in an air tight jar.
So here are the benefits of multani mitti for face, skin and health! Hope this article was just what you were looking for.